Bitbucket
DevOps-as-a-Service can include a hosted and managed version of Atlassian Bitbucket. Please check out the vendor provided documentation to learn how to work in Bitbucket projects. You can skip any documentation related to Bitbucket installation or administration.
- Log in to Bitbucket
- Create a Repository
- Manage Repositories using SSH Connection
- Manage Projects in Bitbucket
- Roles in DevOps Portal and roles in Bitbucket
- Create a branch from an issue in Jira
- View a branch connected to an issue in Jira
- Using Smart Commits
Log in to Bitbucket
Select Projects in DevOps Portal, then click on Bitbucket in the Tools section:

Log in to Bitbucket with your username and password.
If there are no repositories in the project you can Create a repository or you can Import repositories to a project
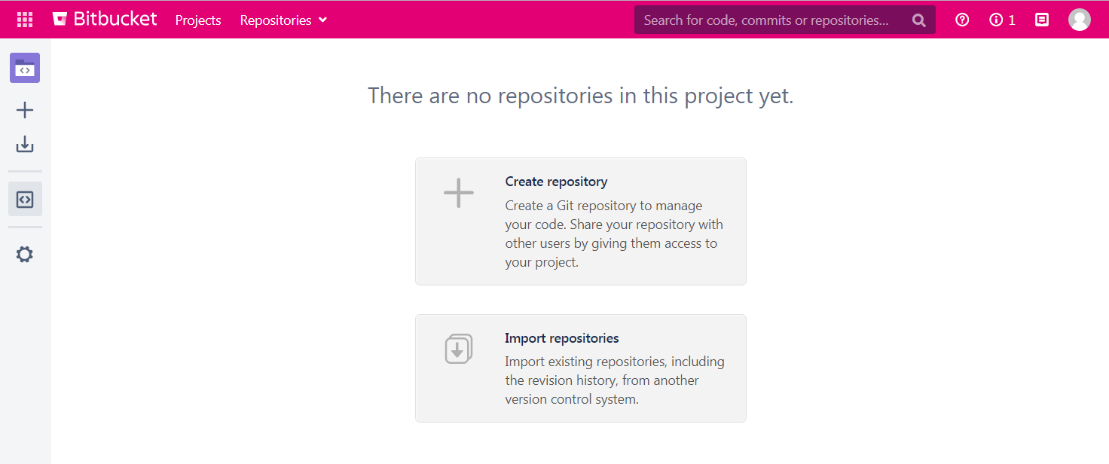
Create a Repository
To create an empty repository click Create repository or the + sign on the left, and then a new window appears:
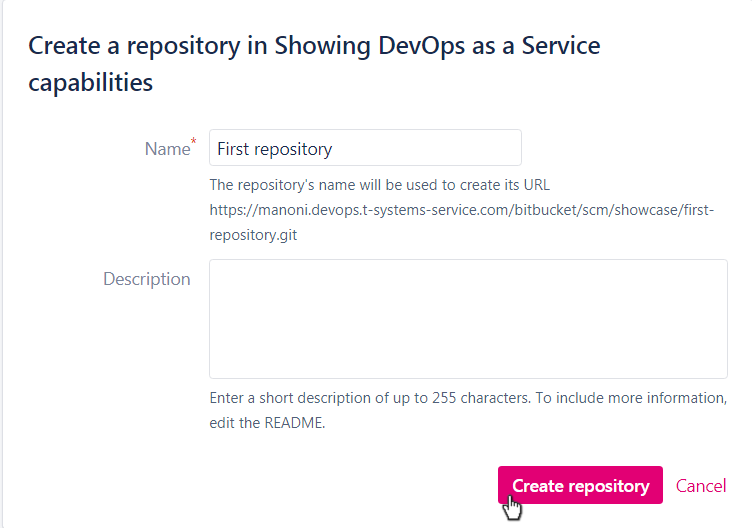
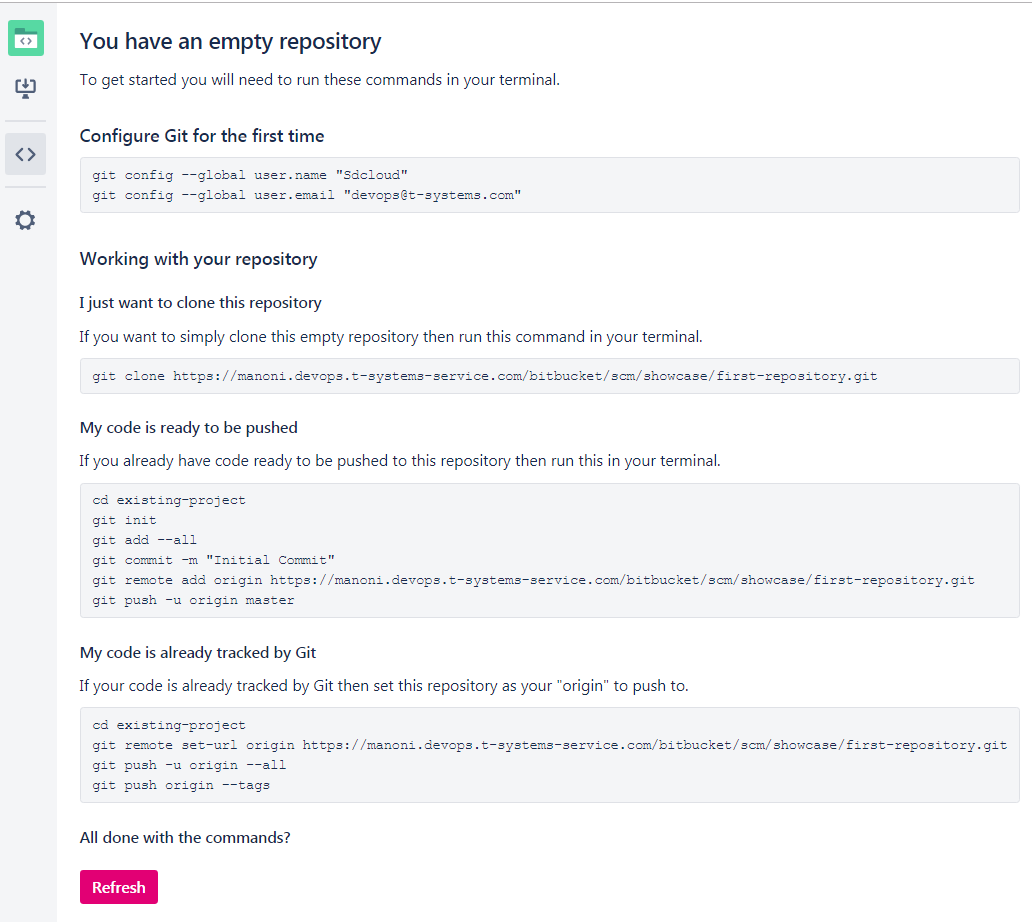
Now an empty repository is created and the hints for further steps are displayed.
Manage Repositories using SSH Connection
It is also possible to manage your repository by using SSH connection.
In your customer environment the URL (containing the created project) refers to the repository.
As an example to clone a repository the following command can be used:
For SSH connection the same command can be used like this:
Manage Projects in Bitbucket
If you are assigned to more than one project you can see these by clicking Projects:

In this example the user is assigned to CCTS and SHOWCASE projects.

If you click on the project's name the (created or imported) repositories will appear. In this example an imported repository can be found by clicking Showing DevOps-as-a-Service capabilities.

If you click on the repository's name (in this example sdcloud-caas-nginx-demo) the source content will appear:
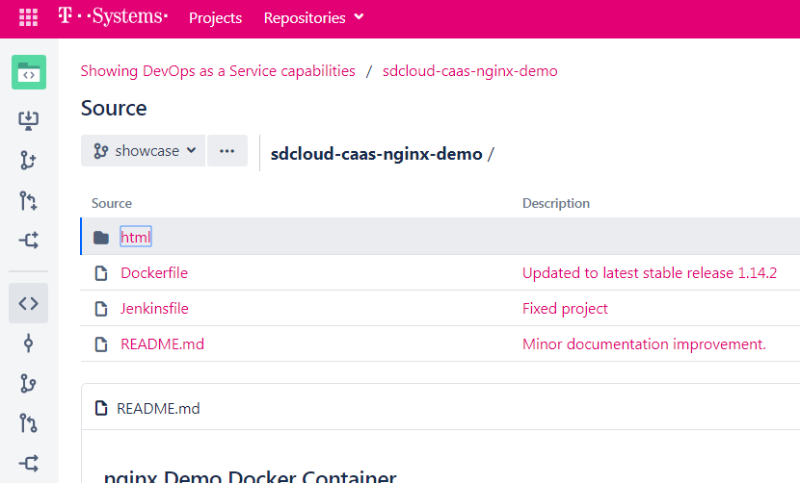
On the left side you can see the options such as creating a branch, pull request, or fork.
Roles in DevOps Portal and roles in Bitbucket
The roles are handled automatically by DevOps Portal, and when a user is created in DevOps Portal with a role in a project all permissions are automatically set in Bitbucket, too.
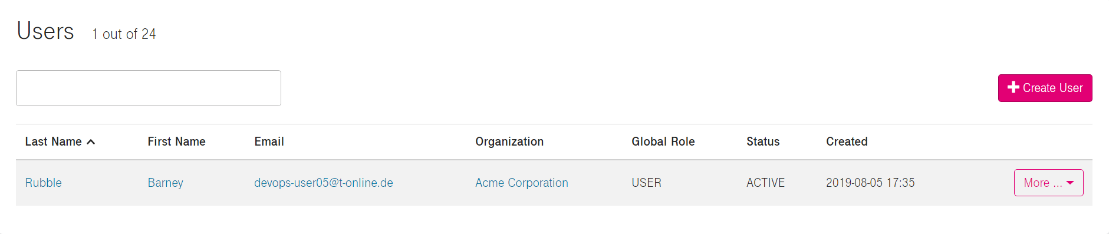
In this example the user (Barney Rubble) in DevOps Portal has Developer role in the project.

In Bitbucket the permissions connected to this role are automatically created:
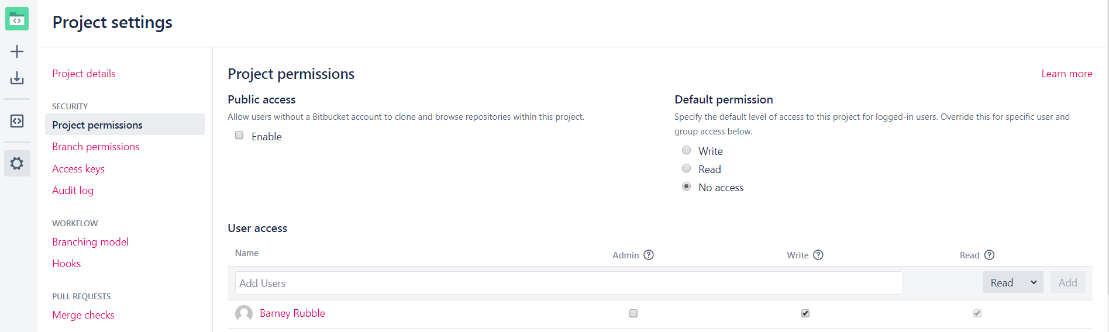
This example shows that the user with Developer role has Write and Read but no Admin rights.
Above you can see how the roles in the project are handled in Bitbucket's project permissions:
| DevOps Portal role | User access in Bitbucket | ||
|---|---|---|---|
| Admin | Write | Read | |
| Viewer | ❌ | ❌ | ❌ |
| Developer | ❌ | ✅ | ✅ |
| Master | ❌ | ✅ | ✅ |
| Admin | ✅ | ✅ | ✅ |
Create a branch from an issue in Jira
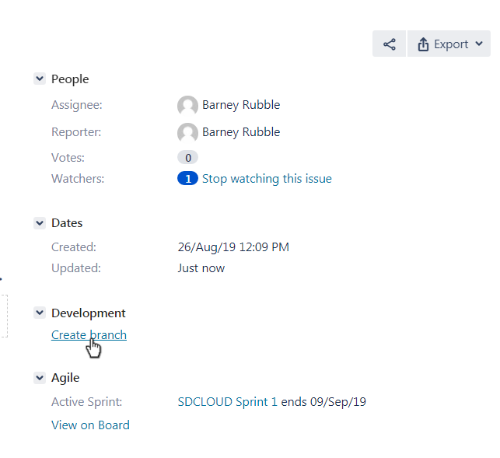
In the Development panel, click Create Branch:
This will open up Bitbucket's create branch screen, choose the repository where you want to create the branch.
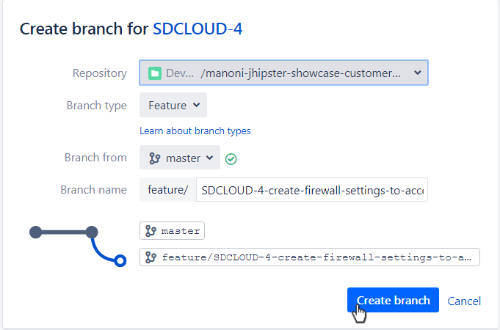
Select the Branch type and Branch name (Bitbucket may suggest a Branch type based on the Jira Software issue type, when the branching model is configured)
A branch type can be Bugfix, Feature, Hotfix, Release or Custom.

In the Branch from option a branch can be selected from existing branches, at first time only the master branch can be selected.
Click Create branch to continue.
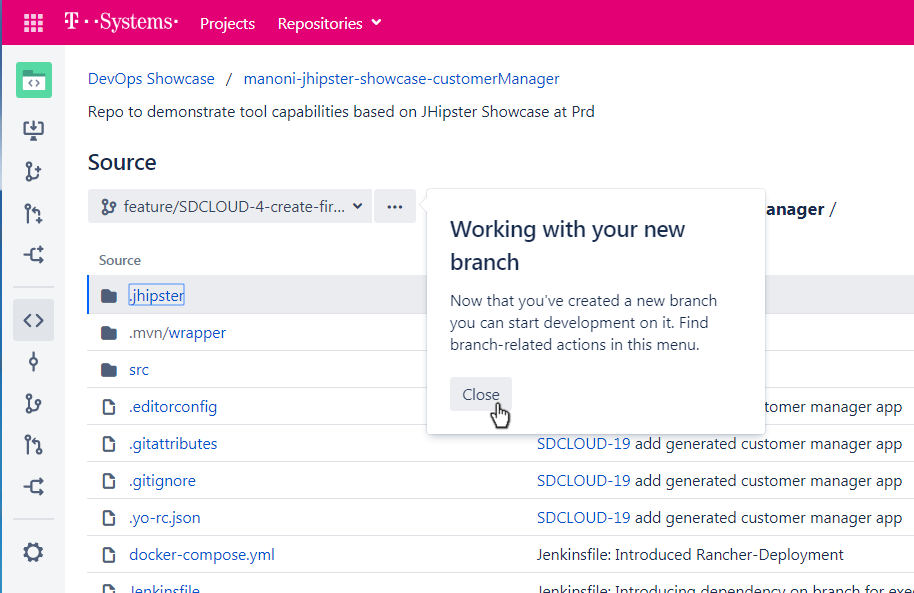
Once the new branch is created, Bitbucket takes you to the file listing. You can now pull to your local repository and switch to the new branch.
In this example it is the Jhipster showcase, a repository to demonstrate tool capabilities:
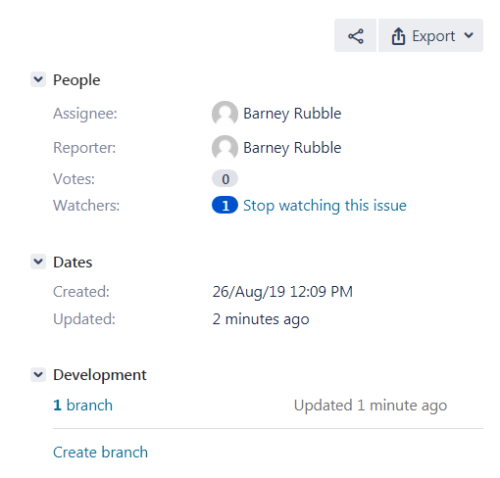
Switching back to Jira the issue now displays the created branch:
The branching models and issue types are mapped in this way:
Jira Software issue type | Bitbucket branch type |
|---|---|
Bug | Bugfix (Feature if Bugfix type is not enabled) |
Story | Feature |
Other | Other/Custom |
View a branch connected to an issue in Jira
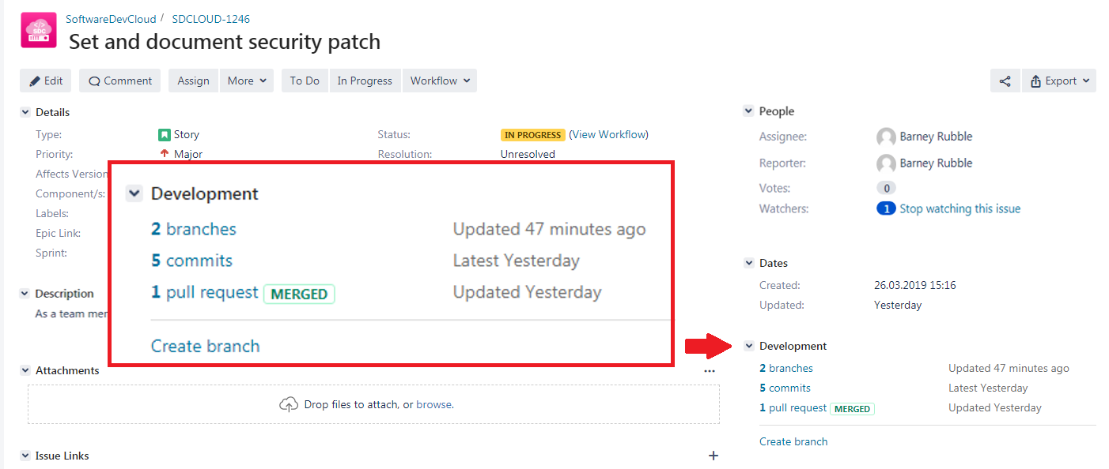
If there has been a branch created in Jira (as a result the branch name should begin with the ticket id) the development tab will appear in the Jira ticket.
There you will have direct links to the existing branch, commits, and pull requests.
In this example you can see the Development tab of the Jira ticket named SDCLOUD-1246.
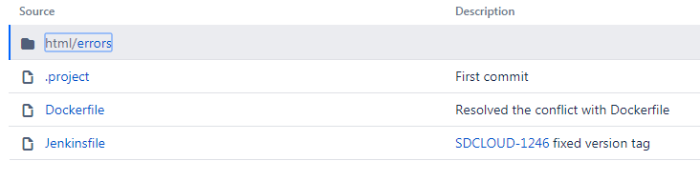
If you push your code into Bitbucket, and write the Jira ticket's id in the commit section, as a result a direct link will be created in Bitbucket to the corresponding Jira ticket.
In this example in a Bitbucket repository the linked ticket's name is SDCLOUD-1246.
Using Smart Commits
Smart Commits allow repository committers to perform actions such as transitioning Jira Software issues by embedding specific commands into their commit messages.
You can:
- comment on issues
- record time tracking information against issues
- transition issues to any status defined in the Jira Software project's workflow.
Each Smart Commit message must not span more than one line (i.e. you cannot use a carriage return in the command), but you can add multiple commands to the same line.
Smart Commit commands
The basic command line syntax for a Smart Commit message is:
Any text between the issue key and the Smart Commit command is ignored.
There are three Smart Commit commands you can use in your commit messages:
comment
time
transition
Comment
Description
Adds a comment to a JIRA Software issue.
Syntax
<ignored text> ISSUE_KEY <ignored text> #comment <comment_string>
Example
JRA-34 #comment corrected indent issue
Notes
The committer's email address must match the email address of a single JIRA Software user with permission to comment on issues in that particular project.
Time
Description
Records time tracking information against an issue.
Syntax
<ignored text> ISSUE_KEY <ignored text> #time <value>w <value>d <value>h <value>m <comment_string>
Example
JRA-34 #time 1w 2d 4h 30m Total work logged
Notes
This example records 1 week, 2 days, 4 hours and 30 minutes against the issue, and adds the comment 'Total work logged' in the Work Log tab of the issue.
- Each value for w, d, h and m can be a decimal number.
- The committer's email address must match the email address of a single JIRA Software user with permission to log work on an issue.
- Your system administrator must have enabled time tracking on your JIRA Software instance.
Workflow transitions
Description
Transitions a JIRA Software issue to a particular workflow state.
Syntax
<ignored text> ISSUE_KEY <ignored text> #<transition_name> <comment_string>
Example
JRA-090 #close Fixed this today
Notes
This example executes the close issue workflow transition for the issue and adds the comment 'Fixed this today' to the issue. Note that the comment is added automatically without needing to use the #comment command.
You can see the custom commands available for use with Smart Commits by visiting the JIRA Software issue and seeing its available workflow transitions:
- Open an issue in the project.
- Click View Workflow (near the issue's Status).
The Smart Commit only considers the part of a transition name before the first space. So, for a transition name such as finish work, then specifying #finish is sufficient. You must use hyphens to replace spaces when ambiguity can arise over transition names, for example: #finish-work.
If a workflow has two valid transitions, such as:
- Start Progress
- Start Review
A Smart Commit with the action #start is ambiguous because it could mean either of the two transitions. To specify one of these two transitions, fully qualify the transition you want by using either #start-review or #start-progress.
- When you resolve an issue with the #resolve command, you cannot set the Resolution field with Smart Commits.
- If you want to add a comment during the transition, the transition must have a screen associated with it.
- The committer's email address must match the email address of a single JIRA Software user with the appropriate project permissions to transition issues.