Jira
- First steps in Jira
- Issues
- Sprints
- Dashboards
- Boards
- Manage Projects
- JIRA Project Roles / Permission Scheme
First steps in Jira
Log in to Jira from SDPortal
In SDPortal click Jira in the Tools section of your project.
In this example the FCI project will be the selected project to work on.

In this example the user is assigned to two projects, and the user has a specific role in each project.
Log in to Jira with your username and password:

First login to Jira
If you log in for the first time, you can choose the preferred language and your avatar image, then you can continue by clicking Next button:
Gravatar is enabled for user avatars, so your Gravatar - i.e. the Gravatar associated with the email address in your user profile - will automatically be set as your user avatar and this step will be skipped.

The next screen shows the Backlog, where the created issues will appear.
If you are the first user to create an issue, the Backlog will be empty:

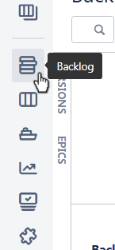
You can open the backlog any time by clicking the backlog button on the left:
Select Project
If you would like to create or view issues belonging to other projects you can select the project by clicking Projects on the top

In this example you can see the same projects that are assigned to this user in SDPortal (Future Cloud Infrastructure and Showing Devops as a Service capabilities).
If View All Projects is selected, you can see the projects you are assigned to.

You can select the desired project to continue your work.
Issues
Issues are the building blocks of any Jira project. An issue could represent a story, a bug, a task, or another issue type in your project.
Create an Issue
To create an issue click the Create an issue button.

First you have to select the Issue Type, which can be Task, Story, Epic or Bug.
In this example this issue will be a Task.

Fill the required fields, the user who creates the issue ticket will be the Reporter.

If there are tickets that have been already created you can link those to this ticket as Linked Issues.
You can also link this issue to an Epic, or to an existing Sprint.
The Assignee can be selected from existing users, or you can assign it to yourself by clicking Assign to me.
(For further refinement of the settings click Configure Fields.)
To create the ticket click the Create button.

Now your ticket appears in the Backlog:

By repeating these steps you can add new issues to the Backlog.
Edit an Issue
You can Edit or Delete the issue ticket any time, simply just click the ticket name (in this example FCI-1) in the Backlog:

Then click on the Issue menu button (three dots) on the right side:

Edit an issue can be useful option if you would like to for example assign an issue to another user (allows you to edit all the fields that are possible to edit when creating an issue).
Find a recently created Issue
Select the Project you want to see a recently created issue (here as example the project name is Future Cloud Infrastructure) - click on Project button on the top, select View all Projects, the click on the selected Project:

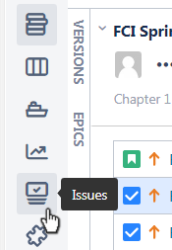
Click the Issues button on the left column:
Now all open issues are listed.
On the Order by Priority click the drop down Menu and select Created:

You can also use the search field to find a category for the order of issues.
Search for issues
To find a specific issue you should use the search field on the top right section in Jira and start typing words related to the issue that you are searching for.
In this example the issue that is being searched is Create documentation for Release 1.0
If you are assigned to more than 1 project, the matching results for the search may display issues from other projects too:

Sprints
In Jira Software, you can view sprints on a board and assign issues to sprints - this feature is only available for Scrum boards.
Start a Sprint
If you and your colleagues created the issues you can set up a sprint.
Keep in mind that only Admin and Master roles allows to create a sprint (with only Developer or Viewer role it is not possible).
Select the Backlog icon on the left column then click on Create Sprint.

To determine a sprint goal (that you may want to achieve at the end of the sprint) just click on the sprint menu (three dots) on the right and then select Add sprint goal.

After you have set the goals proceed to drag and drop the selected issue(s) from the Backlog to Plan your Sprint section.

The dragged issues appear in the sprint section (here it is named FCI Sprint 1). If all the desired issues are in this section click on Start Sprint:

Then you can set the Duration and Start Date for the sprint,
To start the sprint click Start:

A successful Sprint start will display this message: " Sprint 'FCI Sprint 1 has successfully started'. "
Move existing Issues from Backlog into current Sprint
Select in Jira the Backlog icon on the left column and with the mouse proceed to drag and drop the desired issues from Backlog to the sprint.
In this example the issue named FCI-4 is being added to the current sprint.
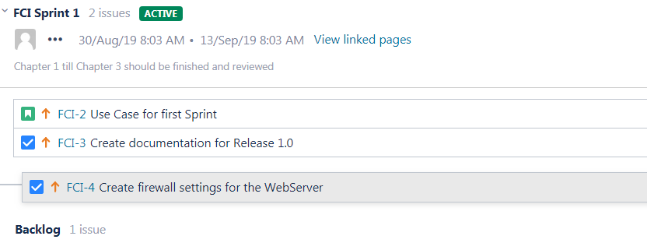
After an issue has been dragged the following message appears and you have to Confirm the change:

Manage Sprints
If you would like to manage issues in the sprint click Active sprints on the left column:

If you start work on an issue you can simply drag the issue from To Do to the In Progress column (this status can be set by Edit an issue too)
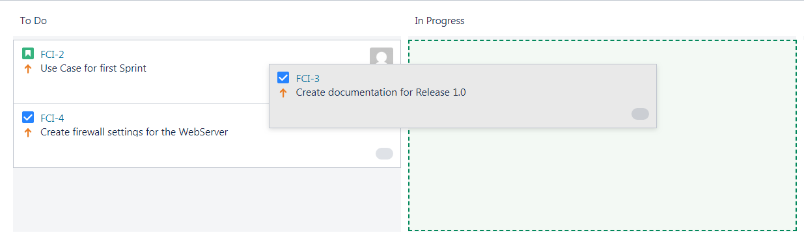
If an issue is closed you can drag to the Done column also, and the letters will change to the strike-through type.
In this example the work on FCI-2 has not started yet, FCI-3 is in progress and FCI-4 is finished:

You can also close the current sprint any time by clicking on Complete Sprint on the top right.

Dashboards
Your dashboard is the main display you see when you log in to Jira. You can create multiple dashboards from different projects, or multiple dashboards for one massive overview of all the work you're involved with.
Create a new Dashboard
You can create custom dashboards to Jira by clicking the Dashboards tab, then click on Manage Dashboards:

Select the Dashboards Tab and on the right side select Create new dashboard button on the top right corner:

Fill the Name field (Description is mandatory), then select the Project option from Add Viewers (you will see the project name appearing next to this).
The options can be to select a Group (for example jira-software-users), members of an exact Project, Any logged-in user (no matter what projects assigned to the users) or Public.

You can pick a role (in the project) or you can select All (as this example shows), and you have to click Add to set the Viewers for this dashboard.

You also have to Add Editors for the dashboard (in the next row), for example you can choose a User (instead of group) then start typing the username to select the user:

Click Add at the end of this line, and if you would like to add a another user just type in the field and click Add again.
In this example the users add to Editors have the right to edit this dashboard.
To create this new dashboard click Add on the bottom:

Add Gadgets to Dashboards
Now the new dashboard is available (when you click on Dashboards on the top), click on the created dashboard to continue with adding gadgets:

In the appearing screen you can see your selected dashboard's name on the right.
Click on add a new gadget to populate a gadget to this dashboard:

By default you can add only the Bubble Chart and the Introduction gadget, so click on Load all gadgets to see more:

You can select from the loaded gadgets by clicking Add gadget. In this example a new Pie Chart will be placed on the dashboard:

You can select more gadgets (in this example Issues in progress is also added) and if you are finished the selection you can close this window by clicking X on the top.
You can reorder the gadgets by drag and drop method.
Fill the fields with the required data or sslect the available oprtions. For the Pie chart for example you can select the project:

Click Save on each gadget to see the results
In this example the Pie Chart shows the Assignee of the tickets, and the Issues in progress show only the ticket which is assigned to the user who is created the dashboard:

Manage Dashboards
Select the Dashboards tab and select Manage Dashboards

In this example, the user has yet created another dashboard (SDCloud Dashboard) and has the right to modify each dashboard by clicking the clog icon - available options are Edit, Delete or Copy the dashboard.

Boards
A board displays issues from one or more projects, giving you a flexible way of viewing, managing, and reporting on work in progress. The available types of boards in Jira are:
- Scrum board: For teams that plan their work in sprints. Includes a backlog.
- Kanban board: For teams that focus on managing and constraining their work-in-progress. Includes the option of a Kanban backlog
Select the Boards tab and select View all boards:

Create Boards
To create a new board click on Create board button on the right corner:

Select the type of the new board: it can be Scrum or Kanban board.

In this example a Scrum board have been selected and there is an option to create a Board from an existing project or from an existing Saved Filter.
Type the Board Name and select a Project(s). Then click Create board.
In this example the name is Custom Scrum board for FCI and the selected project is Future Cloud Infrastructure.

The following message indicates that the new board has been created:

Now you can modify the board's properties, all the settings based on the project's board by default.
Manage Boards
Click the Board menu (3 dots on the right) of the selected board:

You can Copy or Delete the board, and you can also modify the default settings by selecting Configure:

The General information of the board appears, containg the board's name, the administrator(s), the filter data, and the owner (of the project)

Configuring Columns of a Board
To Edit the columns of the board (e.g. you would like to create a new column) just click Columns tab on the left.
In the following example a new column will be added named Pending.
First a new status can be created by clicking Add status:

In the appearing window type Blocked for the name than click Add to create a new status.

Then the new column can be created by clicking Add column:

In the appearing window type Blocked for the name than click Add to create a new column.

Now the new column with a new status has been created:

You can also change the columns order with a drag and drop method.
Configuring Swimlanes
To configure the rows (to group issues) click Swimlanes on the left then select from Base Swimlanes on:

Configuring quick filters
You can set custom filter tabs for the board - in this example a new tab named Max Mustermann is created, and by clicking this tab only the user's issues visible:

Other Configuration Options
You can set the design of the board by changing settings in Card colors or Card layout
Estimation can be based on Story Points, Original Time Estimate, or Issue Count.
You can set the Working days also (by default it is Monday-Friday)
You can customize the issue's appearance in Issue Detail View.
Manage Projects
Click on the Administration icon in the top right corner, then select Projects:

Click on the selected project (in this example Future cloud Infrastructure):

The Summary page of the Project settings appear:

In the left column you can find the category of the settings, which are also visible in the Summary page.
If you click Details on the left you can a brief information of the current project.

You can change the name or the description of the project but it is not allowed to change the Project Key - which is managed in SDPortal.
Manage Issue types
Click left on Issue types to see what type of issues are used in the project..
By default there are 5 issue types you can choose from: Story, Bug, Epic, Task or Sub-task.

Each issue type belongs to a workflow, which can be seen by clicking the issue types on the left. You can see the same chart if you click Workflows the select the issue type.
Manage Workflows and Fields
Click Workflows on the left, then select an issue type. In this example it is the Story:

You can see the workflow of thee issue type, which can be change by clicking Edit, or you can modify the fields by clicking Fields.

You can also edit the fields by clicking Fields on the left.
Manage Priorities
You can see the issue priority types by clicking Priorities on the left column:

By default there are 6 priority types: Highest, High, Medium, Low, Lowest and Major.
Manage users
Select Users and roles on the left menu and you can see the users and groups with the assigned roles:

Change the Project Lead in Jira
Select the user who would be the Project Lead on the top (in this example Barney Rubble), and change the Default Assignee to Project Lead, then click Update:

Now as the example shows Barney Rubble is the Project Lead, and this user will be the Default Assignee of the created issues:

Manage user permissions

JIRA Project Roles / Permission Scheme
Jira is using the SDCloud Permission Scheme which is associated with Jira projects.
| Permission / Role | Admin | Master | Developer | Viewer |
|---|---|---|---|---|
| Project Permissions | ||||
| Administer projects Enabled Extended project administration | ✅ | ❌ | ❌ | ❌ |
| Browse projects | ✅ | ✅ | ✅ | ✅ |
| Manage sprints | ✅ | ✅ | ❌ | ❌ |
| Service Desk Agent * | ✅ | ✅ | ✅ | ❌ |
| View development tool | ✅ | ✅ | ✅ | ✅ |
| View (read-only) workflow | ✅ | ✅ | ✅ | ✅ |
| Issue Permissions | ||||
| Assign issues | ✅ | ✅ | ✅ | ❌ |
| Assignable user | ✅ | ✅ | ✅ | ❌ |
| Close issues | ✅ | ✅ | ❌ | ❌ |
| Create issues | ✅ | ✅ | ✅ | ❌ |
| Delete issues | ✅ | ❌ | ❌ | ❌ |
| Edit issues | ✅ | ✅ | ✅ | ❌ |
| Link issues | ✅ | ✅ | ✅ | ❌ |
| Modify reporter | ✅ | ✅ | ❌ | ❌ |
| Move issues | ✅ | ✅ | ❌ | ❌ |
| Resolve issues | ✅ | ✅ | ✅ | ❌ |
| Schedule issues | ✅ | ✅ | ❌ | ❌ |
| Set issues security | ✅ | ❌ | ❌ | ❌ |
| Transition issues | ✅ | ✅ | ✅ | ❌ |
| Voters & watchers permissions | ||||
| Manage watcher list | ✅ | ✅ | ❌ | ❌ |
| View voters and watchers | ✅ | ✅ | ✅ | ❌ |
| Comments permissions | ||||
| Add comments | ✅ | ✅ | ✅ | ❌ |
| Delete all comments | ✅ | ❌ | ❌ | ❌ |
| Delete own comments | ✅ | ✅ | ✅ | ❌ |
| Edit all comments | ✅ | ❌ | ❌ | ❌ |
| Edit own comments | ✅ | ✅ | ✅ | ❌ |
| Attachments permissions | ||||
| Create attachments | ✅ | ✅ | ✅ | ❌ |
| Delete all attachments | ✅ | ❌ | ❌ | ❌ |
| Delete own attachments | ✅ | ✅ | ✅ | ❌ |
| Time-tracking Permissions | ||||
| Work on issues | ✅ | ✅ | ✅ | ❌ |
| Delete all worklogs | ✅ | ❌ | ❌ | ❌ |
| Delete own worklogs | ✅ | ✅ | ✅ | ❌ |
| Edit all worklogs | ✅ | ❌ | ❌ | ❌ |
| Edit own worklogs | ✅ | ✅ | ✅ | ❌ |
* Service Desk Agent is only available if the software was added to JIRA